So… wow, I finally managed to get it all up and running. The amount of effort is way more than I would’ve liked but at least it’s done now. There’s a ton of things I would like to write about, especially the troubleshooting steps I did so that it’ll be easier to migrate this configuration in the future.
First of all, I tried on my own to get the subdomain routing working with jwilder/Nginx-proxy along with MariaDB and official WordPress image.
https://github.com/jwilder/nginx-proxy
I will write more about the proxy as well as the let’s encrypt SSL containers in another post.
Unfortunately, for whatever ungodly reason I wasn’t able to get it up and running. So after some Google-fu, I came across this article that helped me greatly.
https://cianallner.com/ultimate-wordpress-docker-setup-guide/
I ended up not doing the docker-compose method because I was trying to troubleshoot why I wasn’t able to obtain an SSL certificate from Let’s Encrypt. Bad news, SSL still isn’t working yet but while I was debugging it I hit the rate limit for the number of certificates I could request for in an hour/day/week. Hopefully when that’s sorted out this site will have a proper SSL certificate.
WordPress Multisite
http://www.wpbeginner.com/wp-tutorials/how-to-install-and-setup-wordpress-multisite-network/
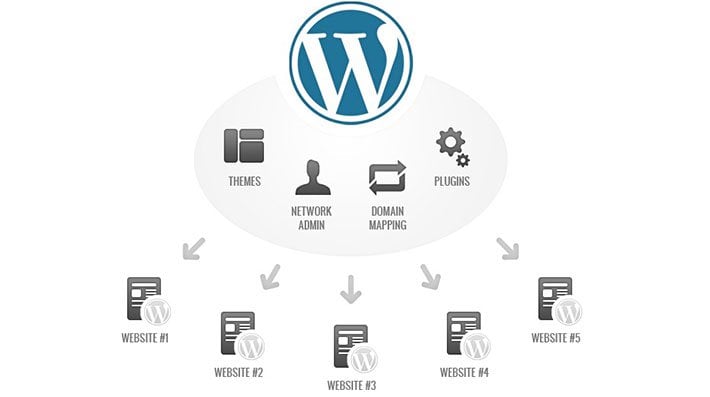
I wanted to have the ability to host multiple WordPress sites, for my own testing/development as well as for my freelance work. Instead of running a separate new WordPress installation every time I need a new site, multi-site allows me to run multiple sites off a single installation and manage them through a centralized zone.
There are two ways of running this.
- sub-domain
- sub-directory (chosen)
The reason for choosing sub-directory was pretty easy for me.
- There is no need for pretty URLs eg. xyz.lordofgeeks.com for the sites I’m hosting
- Let’s Encrypt doesn’t offer wildcard certificates where 1 certificate can cover all sub-domains under
*.lordofgeeks.com - It makes sense that all of the sites belong to blog.lordofgeeks.com/[name-of-site]
For point 2, starting from 2018 onwards, Let’s Encrypt will offer wildcard certificates. So all my effort for setting all these up will be for nought, but it’s still a good learning experience.
Everything went on fine until I added a new site blog.lordofgeeks.com/dev/ and tried to upload a file that’s >1 megabyte.
Getting large file uploads to work
After spending hours checking all over the internet, these are the settings that I had to change in order to make it work.
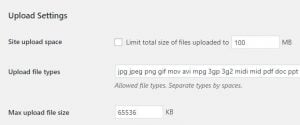
Change the Max upload file size as a super admin and it’ll take change across all the sites. This is probably not ideal if I were to run a business but it’ll do for my personal uses.
In the vhost.d folder that is linked to the Nginx proxy, I had to create a file named after the site’s FQDN, blog.lordofgeeks.com
server_tokens off;
client_max_body_size 100m;
root /var/www/html;
# Necessary for Let's Encrypt
location ^~ /\.well-known {
  allow all;
  alias /var/www/html/.well-known;
  default_type "text/plain";
  try_files $uri =404;
}
The client_max_body_size 100m; is the magic sauce that make bigger file uploads work. server_tokens is used to remove unnecessary information about the server sent in the headers.
I also had to create a uploads.ini file that is linked to the WordPress container (as shown in the Ultimate Guide)
file_uploads = On
memory_limit = 64M
upload_max_filesize = 64M
post_max_size = 64M
max_execution_time = 1800
With these configurations in place (assuming that nothing else cocks up), I was finally able to upload large files without weird http-error that gives me absolutely no information on what’s going wrong.
Getting SSL to work
Update: 29/11/17
I finally got SSL to work with the WordPress but I ended up cheating and using Cloudflare instead of rolling my own Let’s Encrypt configuration. Well, it works in my favour since I’m planning to add a CDN to this site anyway.
Here’s the post in more detail: Cloudflare CDN
Docker configuration
Since I’m running all of these on Docker, this is my exact steps for getting the WordPress part up and running
docker create --name blog.lordofgeeks.com_mariadb_data \
-v /var/lib/mysql mariadb
docker create --name blog.lordofgeeks.com_wordpress_data \
-v /var/www/html wordpress
docker create --name blog \
--restart on-failure \
--link mariadb:mysql \
-e "VIRTUAL_HOST=blog.lordofgeeks.com" \
-e "LETSENCRYPT_HOST=blog.lordofgeeks.com" \
-e "[email protected]" \
-p 443 -p 80 \
--volumes-from blog.lordofgeeks.com_wordpress_data \
-v /home/log/sites/blog.lordofgeeks.com/uploads.ini:/usr/local/etc/php/conf.d/uploads.ini \
wordpress
docker create --name mariadb \
--restart on-failure \
-e MYSQL_ROOT_PASSWORD=[your password here] \
-e MYSQL_DATABASE=[database name] \
--volumes-from blog.lordofgeeks.com_mariadb_data \
mariadb
That’s about it, the rest of the time was spent securing the site and ensuring that I don’t get taken down by some kind of trivial hack. After a good day of work, I finally got my own WordPress network up and running.
If any of my friends want to make use of this to host their profile page of sorts, let me know and I can get you hooked up pretty easily. The only caveat is that the link will have to exist in this format
blog.lordofgeeks.com/[your-site-name]
But I think it’s pretty alright for something that’s totally free for you to post and edit right?